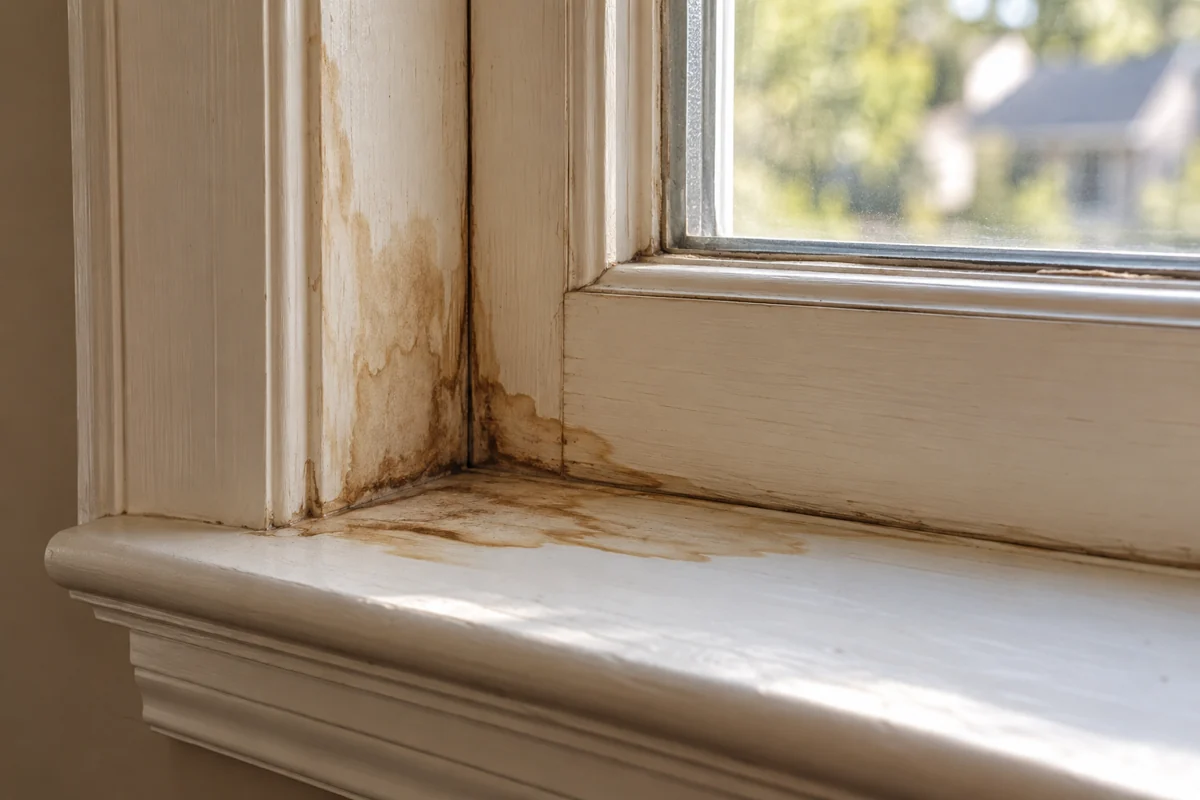
A brown or dark mark on interior window trim can look like a simple finish problem. Its position may offer clues, but it does not by itself identify the source. Water can travel before it becomes visible, and a stain that seems dry between rainstorms may still be active.
Record when the mark appears or changes. Note whether it follows wind-driven rain, cold weather, high indoor humidity or a plumbing event nearby. Photograph the area with a date and include a wider view of the window. This gives a qualified assessor more useful information than a close-up alone.
Inspect the surrounding condition
Look for peeling paint, softened trim, swelling, damp wall finishes and changes in window operation. Do not probe deeply, remove components or open the wall casually. Unknown old coatings can contain lead, and concealed construction needs appropriate assessment before disturbance.
Condensation and exterior leakage require different solutions. Moisture on a cold interior surface may point toward humidity and ventilation conditions; rain-related wetting may involve the window or building envelope. Do not assume that sealing the visible interior seam will fix either cause.
Avoid blocking drainage or ventilation features. A gap or opening that looks unfinished may be part of the window system. Window manufacturer guidance and a competent installer should govern repairs to that assembly, not a generic instruction to caulk every edge.
Establish that the cause is resolved
Painting over an active stain can hide evidence while the material continues to deteriorate. Have leaks and damaged construction addressed and allow the assembly to dry appropriately before evaluating the decorative repair. A surface that appears dry is not always proof that the concealed area has dried.
If the trim remains sound and its shape is intact, a suitable stain-blocking and finish system may be appropriate after safe preparation. Select it for the actual stain and substrate, and test compatibility. A routine finish coat alone may allow discoloration to reappear.
If the material is soft, swollen or has lost its profile, replacement may be required. Match the section and plan its joints rather than building a large filler patch over unsound material. Preserve any useful profile information before removal is carried out safely.
Keep observing after the cosmetic work
A newly painted window can look complete before the next relevant weather event. Recheck after conditions similar to those that produced the mark. A simple dated photograph makes comparison easier.
If the stain returns, revisit the diagnosis instead of adding another blocking coat. Repeated paint repairs can make the profile thick and obscure the history without solving the moisture path.
This is one of the trim problems where restraint saves work. The most useful first action is documenting and investigating, not choosing a stronger primer. Once the window assembly and surrounding materials are sound, the finish repair becomes a much smaller and more predictable task.