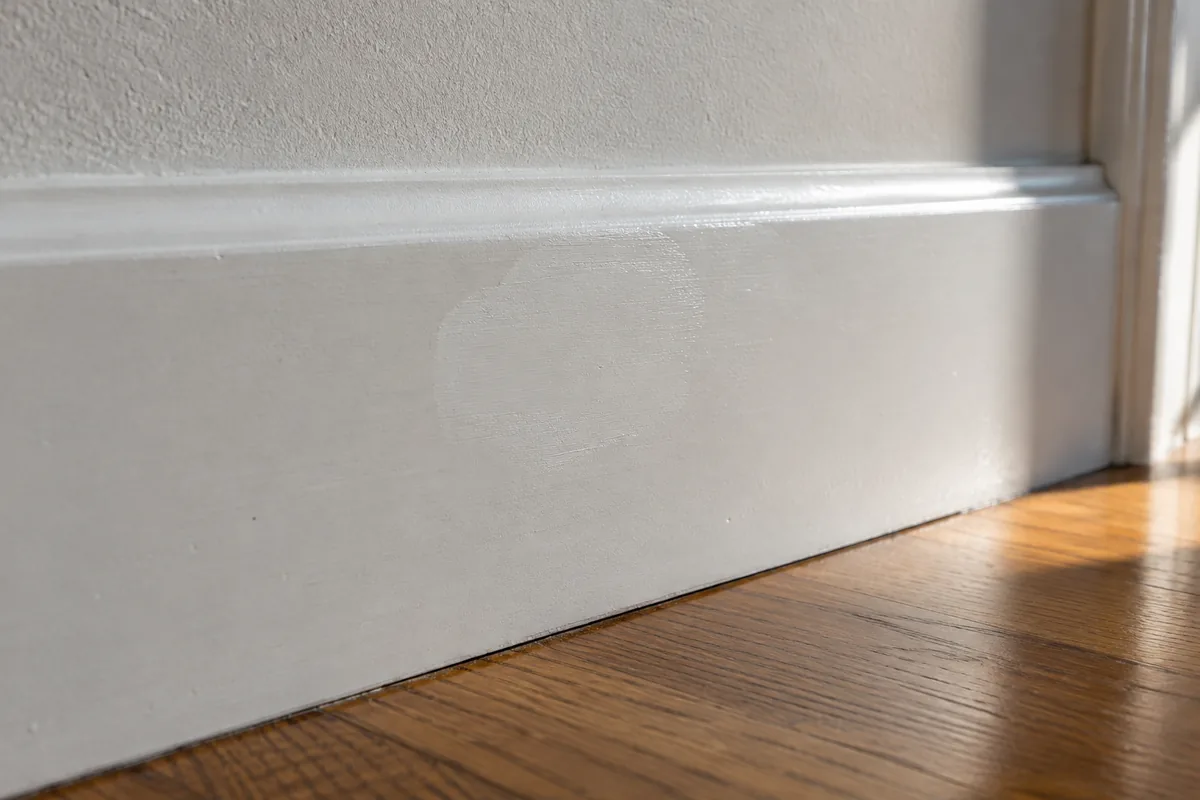
The paint can has the right label, yet the touched-up area catches the light like a separate island. This is often a sheen or texture difference rather than a simple color error. The surrounding finish may also have aged, been cleaned repeatedly or changed with light exposure.
Let the repair reach the appropriate dry state before judging it. Wet and partly cured coatings can look different from the settled finish. View the area under the room's normal lighting and from more than one direction.
Check what changed beneath the paint
A filler patch can absorb differently from the surrounding sealed surface. A primer spot may have a different texture, and sanding can leave a smoother or rougher area. The same topcoat over those surfaces can produce a visible boundary.
Use the preparation and primer sequence recommended for the repair and finish. Do not keep adding topcoat without addressing a ridge, hollow or absorption problem. Old or uncertain coatings need lead assessment before corrective abrasion or removal.
Compare application methods too. A small brush patch on a sprayed or rolled face may leave a different texture. The goal is not to reproduce a technique blindly but to understand why the surface reflects light differently.
Decide whether local blending is realistic
On a narrow molding with a convenient corner or joint, repainting the complete logical section may be more successful than expanding an irregular patch. On a broad uninterrupted face, the boundary can be harder to hide. Consider the viewing angle and finish sheen before spending hours on a tiny blend.
A stain or clear-finish repair has additional challenges because the grain and underlying color remain visible. A generic touch-up marker may alter the color without restoring the surrounding depth or sheen. Test on a matching sample and obtain specialist help for a prominent or valuable piece.
If the original product is no longer available, take a physical sample or representative component to the coating supplier where practical. A phone photograph is a poor basis for an exact match.
Keep the final successful product, sheen and method in the finish record. Store leftover paint according to its instructions and do not assume it remains usable indefinitely. Inspect and mix it as directed before a future repair.
Suppose a casing leg has one filled dent midway down its face. The patch is flat, but a small dab of finish leaves a dull rectangle. Before applying a second random dab, check whether the filler was sealed as the system requires and whether the brush texture matches the surrounding coating. If those issues are resolved but the blend still shows, the top and bottom of that casing leg offer clear repaint boundaries. That can be a more controlled repair than gradually spreading the patch across most of the face while trying to hide each new edge.
A slightly larger, neatly bounded repaint can be less noticeable than a carefully worked small patch. Choose the repair boundary for the finished appearance, not solely for the smallest area that can be covered with a brush.