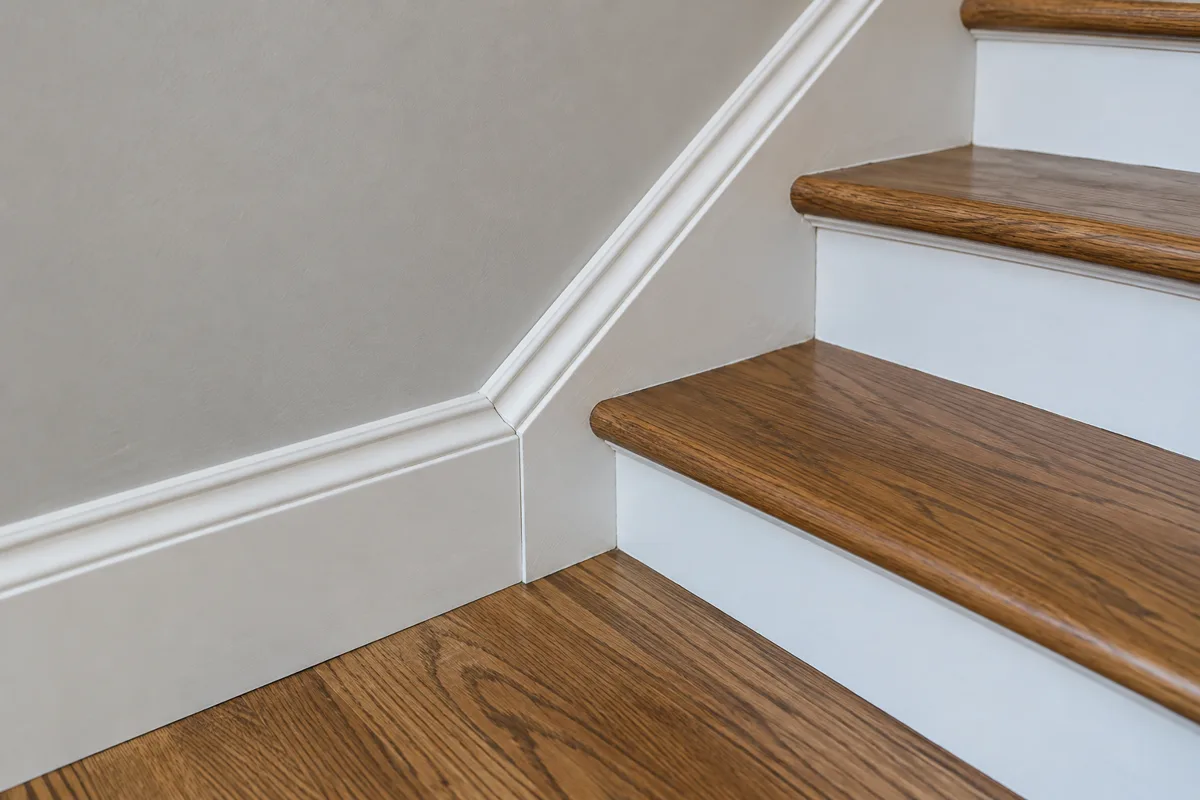
At the bottom of a staircase, a horizontal baseboard meets a sloping skirt or another stair-side finish. The profiles may differ in height, thickness, and direction. Cutting both until they happen to touch can leave a sharp visual kink at one of the most noticeable corners in the house.
Start by identifying the parts already present. A stair skirt is not simply a baseboard tilted uphill; it belongs to the stair assembly and has its own relationship to treads, risers, and wall. This is a finish-planning exercise, not permission to modify structural stair components.
Draw the meeting from the side. Mark the top of the baseboard, the skirt's visible line, and any cap or molding. A separate transition block, a planned return, or a carefully developed profile connection may be appropriate. The useful choice is the one that gives each line a clear destination.
Look from the approach
The junction often receives a close view as someone enters the hall. Check it from standing height and from the side, where thickness differences are obvious. A detail that looks tidy in a flat elevation can have an exposed ledge in three dimensions.
If the baseboard includes a shoe, plan its endpoint independently. It should not run into the first riser or a projecting stair detail without a reason. Likewise, a cap on the skirt should not end as a tiny unsupported point merely to preserve a continuous line.
Existing handrails, newel posts, and required stair clearances set boundaries. Decorative trim must not reduce safe use or interfere with attachments. Have stair-related changes reviewed by an appropriate professional instead of treating the area like an ordinary wall corner.
For an older stair, preserve access to any condition that needs investigation. New molding should not conceal movement, loose parts, or moisture damage. Address those issues before deciding the finish.
A cardboard side profile and a few offcuts are enough to compare the visual options. Once one is selected, photograph the mock-up and note the actual depths. Stair junctions are rarely solved well by a general instruction such as “make it match the base.” A small specific drawing gives the installer a much clearer target.